In the second part of our three-part bridge installation, we focus on the precast concrete panels and the surfacing that brought the bridge together. This phase shows how careful planning and off-site work helped reduce time on site while keeping the project moving smoothly.
Precast Installation
After weighing several options, we selected a precast concrete bridge design to shorten the construction timeline and reduce weather-related delays. This approach allowed most of the work to happen off-site, which would limit exposure to changing conditions. Because the panels were manufactured in a controlled factory environment, they cured evenly and achieved consistent strength and dimensions. As a result, the finished product contains fewer defects than cast-in-place concrete.
Verifying the Replacement Design and Fabrication
Because few manufacturers produce this type of precast bridge component, we selected a qualified precast company in Cleveland after finding no suitable options locally. The initial design was developed using assumed field measurements. Once we were hired and completed partial demolition, the precast team visited the site to take exact measurements.
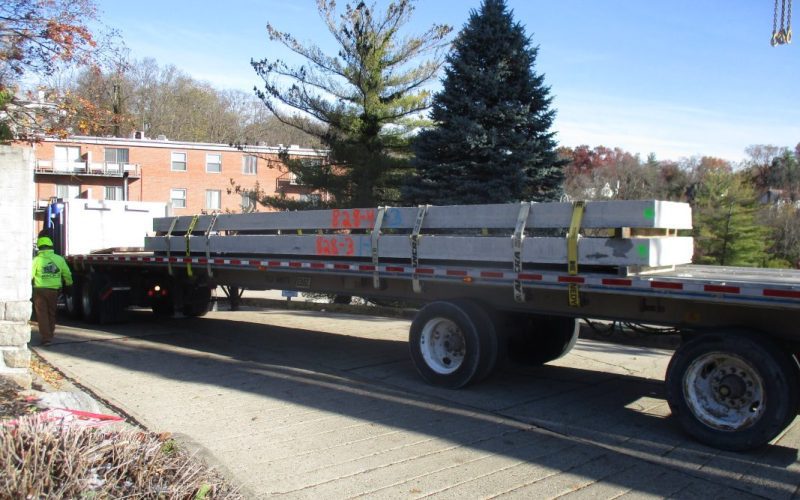
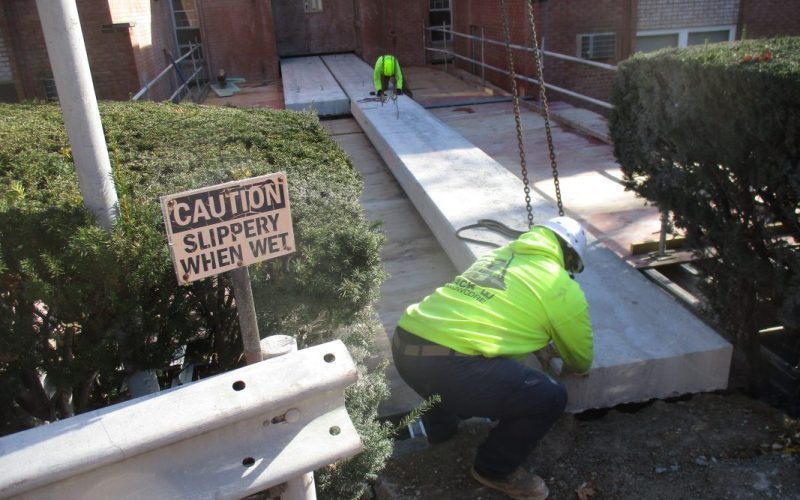
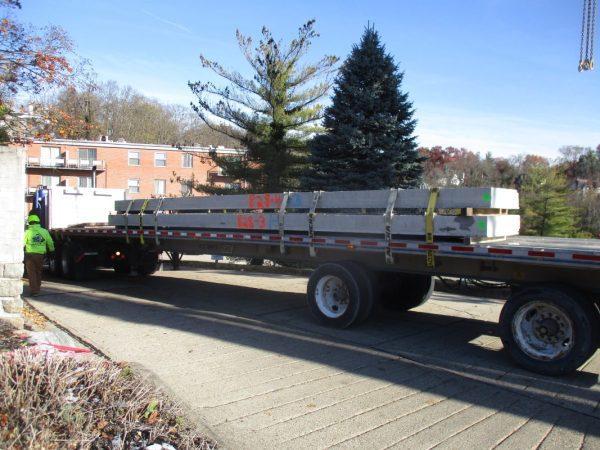
After confirming those measurements, the team returned to Cleveland to fabricate the panels. Although transporting the components added cost, this approach allowed for rapid installation. Setting the primary precast sections was all done in a few hours, which significantly reduced time on site and helped keep the project efficient and on schedule.
Logistics and Installation
Next, we coordinated with the precast company to plan delivery and installation of the bridge sections. Their team scheduled the delivery, arranged for a crane, and managed the placement of each section. Because of the bridge’s location and limited access, the crew stayed in close communication and took extra care as each piece was set, with any welds or attachments required by the plans completed. Their careful work ensured the bridge fit together smoothly.

Cold-Weather Concrete Placement
With the precast structure in place, we sealed the joints and applied a waterproof barrier to the top. This protects the bridge so that if the top layer wears over time, it can be replaced without affecting the entire structure. Once the waterproofing was complete, we poured the concrete topping.
Since the deck was elevated, we used Buckeye Concrete Pumping delivered the mix directly to the bridge. Cold weather presented challenges due to temperature swings that could affect curing. To address this, we monitored temperatures closely and timed the pours carefully, ensuring the concrete cured properly and achieved long-term strength.

Slip Resistance and Surface Performance
To improve pedestrian safety, we added macro fiber to the concrete mix. This slightly roughened the surface and enhanced slip resistance in wet or icy conditions, giving the bridge a safer walkway while maintaining structural integrity.

Structural Milestone
With the precast sections installed and the topping complete, the bridge was ready for finishing and detailing. Careful planning, coordination among all trades, and active management of the concrete placement kept the project on schedule and ensured a durable, high-performance result.
With the structure and deck complete, the project moved into its final phase.
If you have a challenging structural project like this, contact us today to see how we can help!
Part Three next week…